> ## Documentation Index
> Fetch the complete documentation index at: https://docs.kelviq.com/llms.txt
> Use this file to discover all available pages before exploring further.
# Overview
> View and manage customer details, subscriptions, and entitlements.
Managing customers sits at the center of Kelviq. Each customer connects directly to their subscriptions, the plans behind them, and the features they own. You need to understand these relationships to handle the full customer lifecycle.
## View customer list
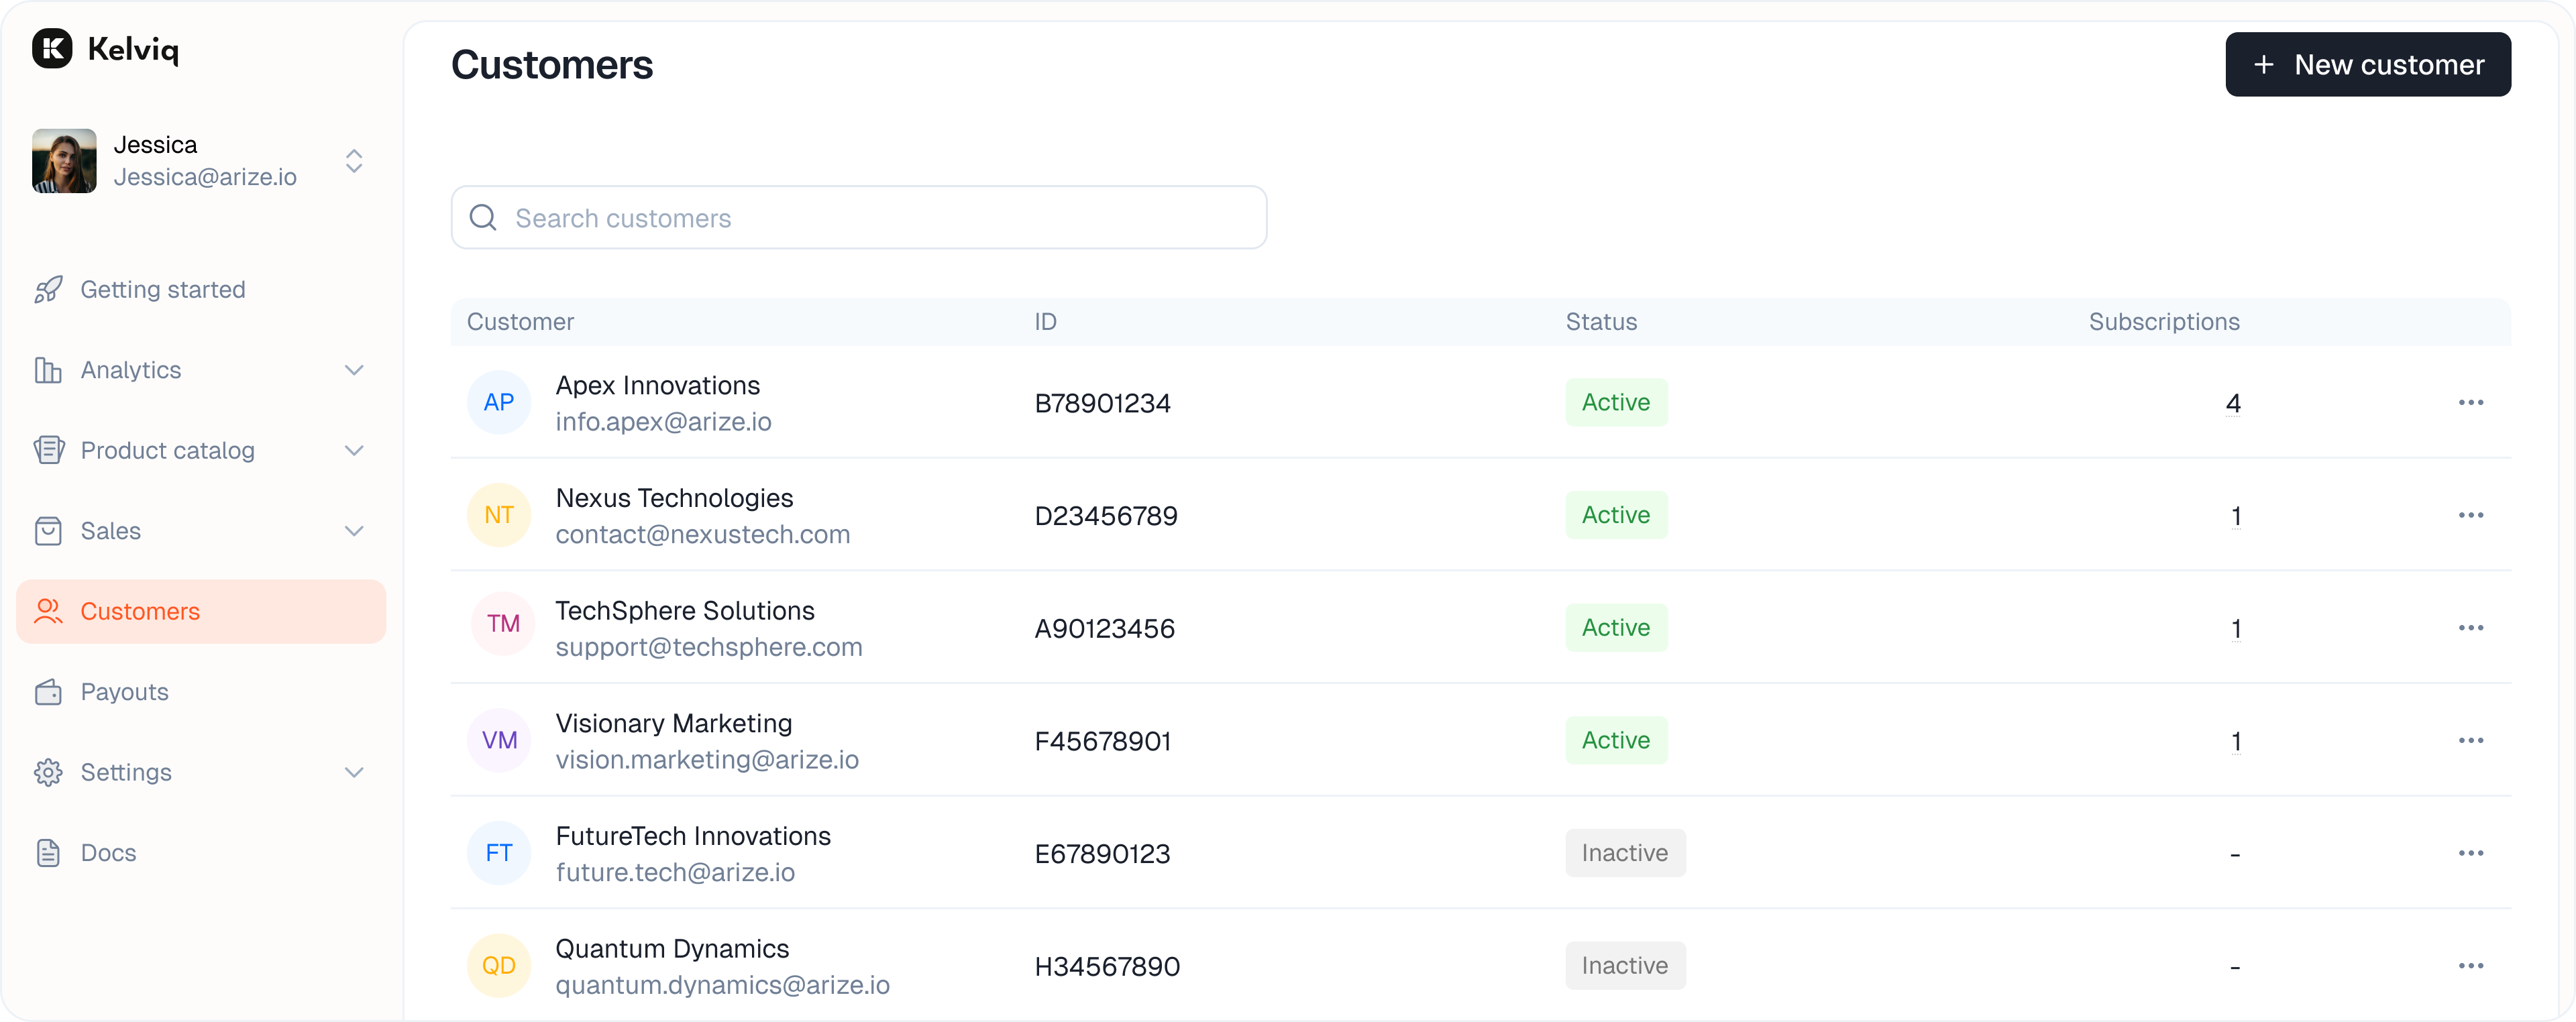
Select **Customers** in the main navigation to see your list.
You can do a few things here.
* **Search** by name, email, or identifier.
* **Add a new customer** with the button in the top right.
* **Manage a customer** by clicking their row to see details.
 ## Add a new customer
You can create records manually.
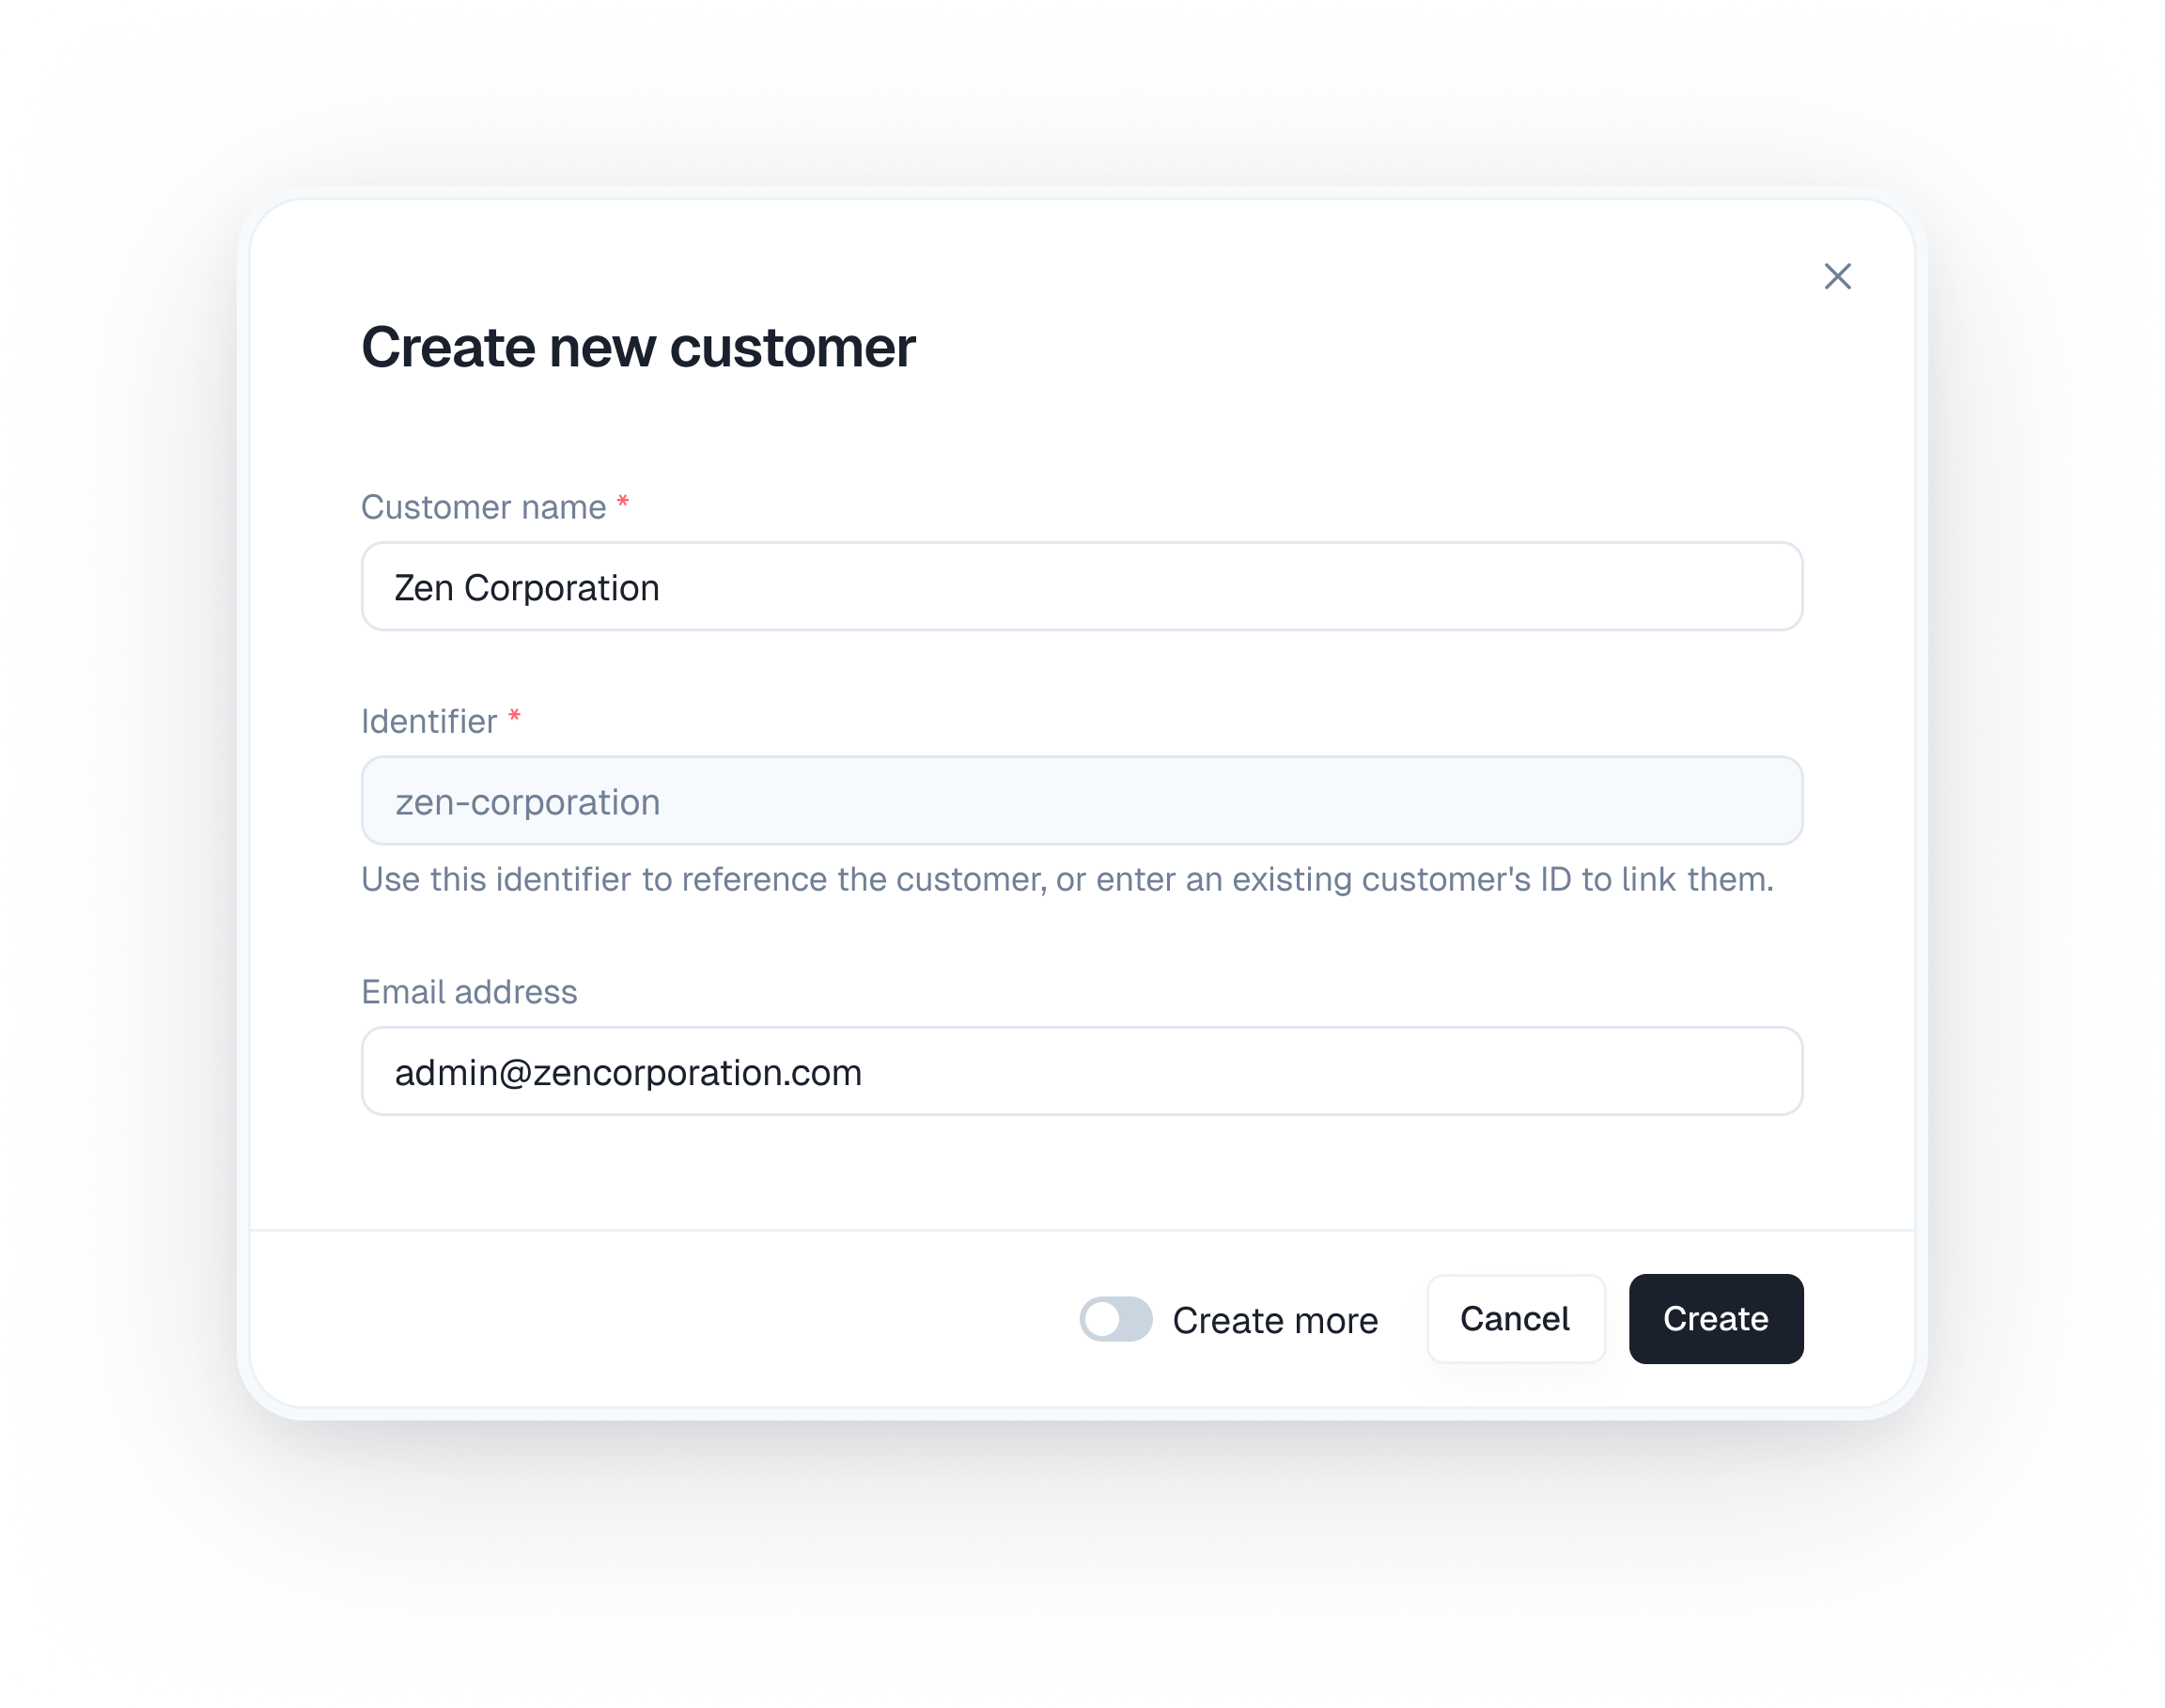
Click **+ New customer** in the top right of the list page.
You need to provide a few key pieces of info.
* **Customer name** is required. Use the person's full name or company name.
* **Identifier** is the unique ID the API uses. We auto-generate this based on the name, but you can edit it. Linking this to the ID in your own database is usually a good idea.
* **Email address** is optional.
Click **Create** to finish.
If you are adding a batch of people, toggle on **Create more**. This keeps the window open so you can add the next one immediately.
## Add a new customer
You can create records manually.
Click **+ New customer** in the top right of the list page.
You need to provide a few key pieces of info.
* **Customer name** is required. Use the person's full name or company name.
* **Identifier** is the unique ID the API uses. We auto-generate this based on the name, but you can edit it. Linking this to the ID in your own database is usually a good idea.
* **Email address** is optional.
Click **Create** to finish.
If you are adding a batch of people, toggle on **Create more**. This keeps the window open so you can add the next one immediately.
 More than one customer record can use the same email address, but every record must have a unique **Identifier**. The API calls this value `customerId`.
When recreating a test customer, you can reuse the email address, but you must provide a new Identifier. An Identifier cannot be reused after its customer is archived. If you receive a `customer already exists` error, check the Identifier first.
## Manage existing customers
You can edit details or revoke access from the list view.
### Edit a customer
Click the **three dots** on the right side of the customer row and select **Edit**.
More than one customer record can use the same email address, but every record must have a unique **Identifier**. The API calls this value `customerId`.
When recreating a test customer, you can reuse the email address, but you must provide a new Identifier. An Identifier cannot be reused after its customer is archived. If you receive a `customer already exists` error, check the Identifier first.
## Manage existing customers
You can edit details or revoke access from the list view.
### Edit a customer
Click the **three dots** on the right side of the customer row and select **Edit**.
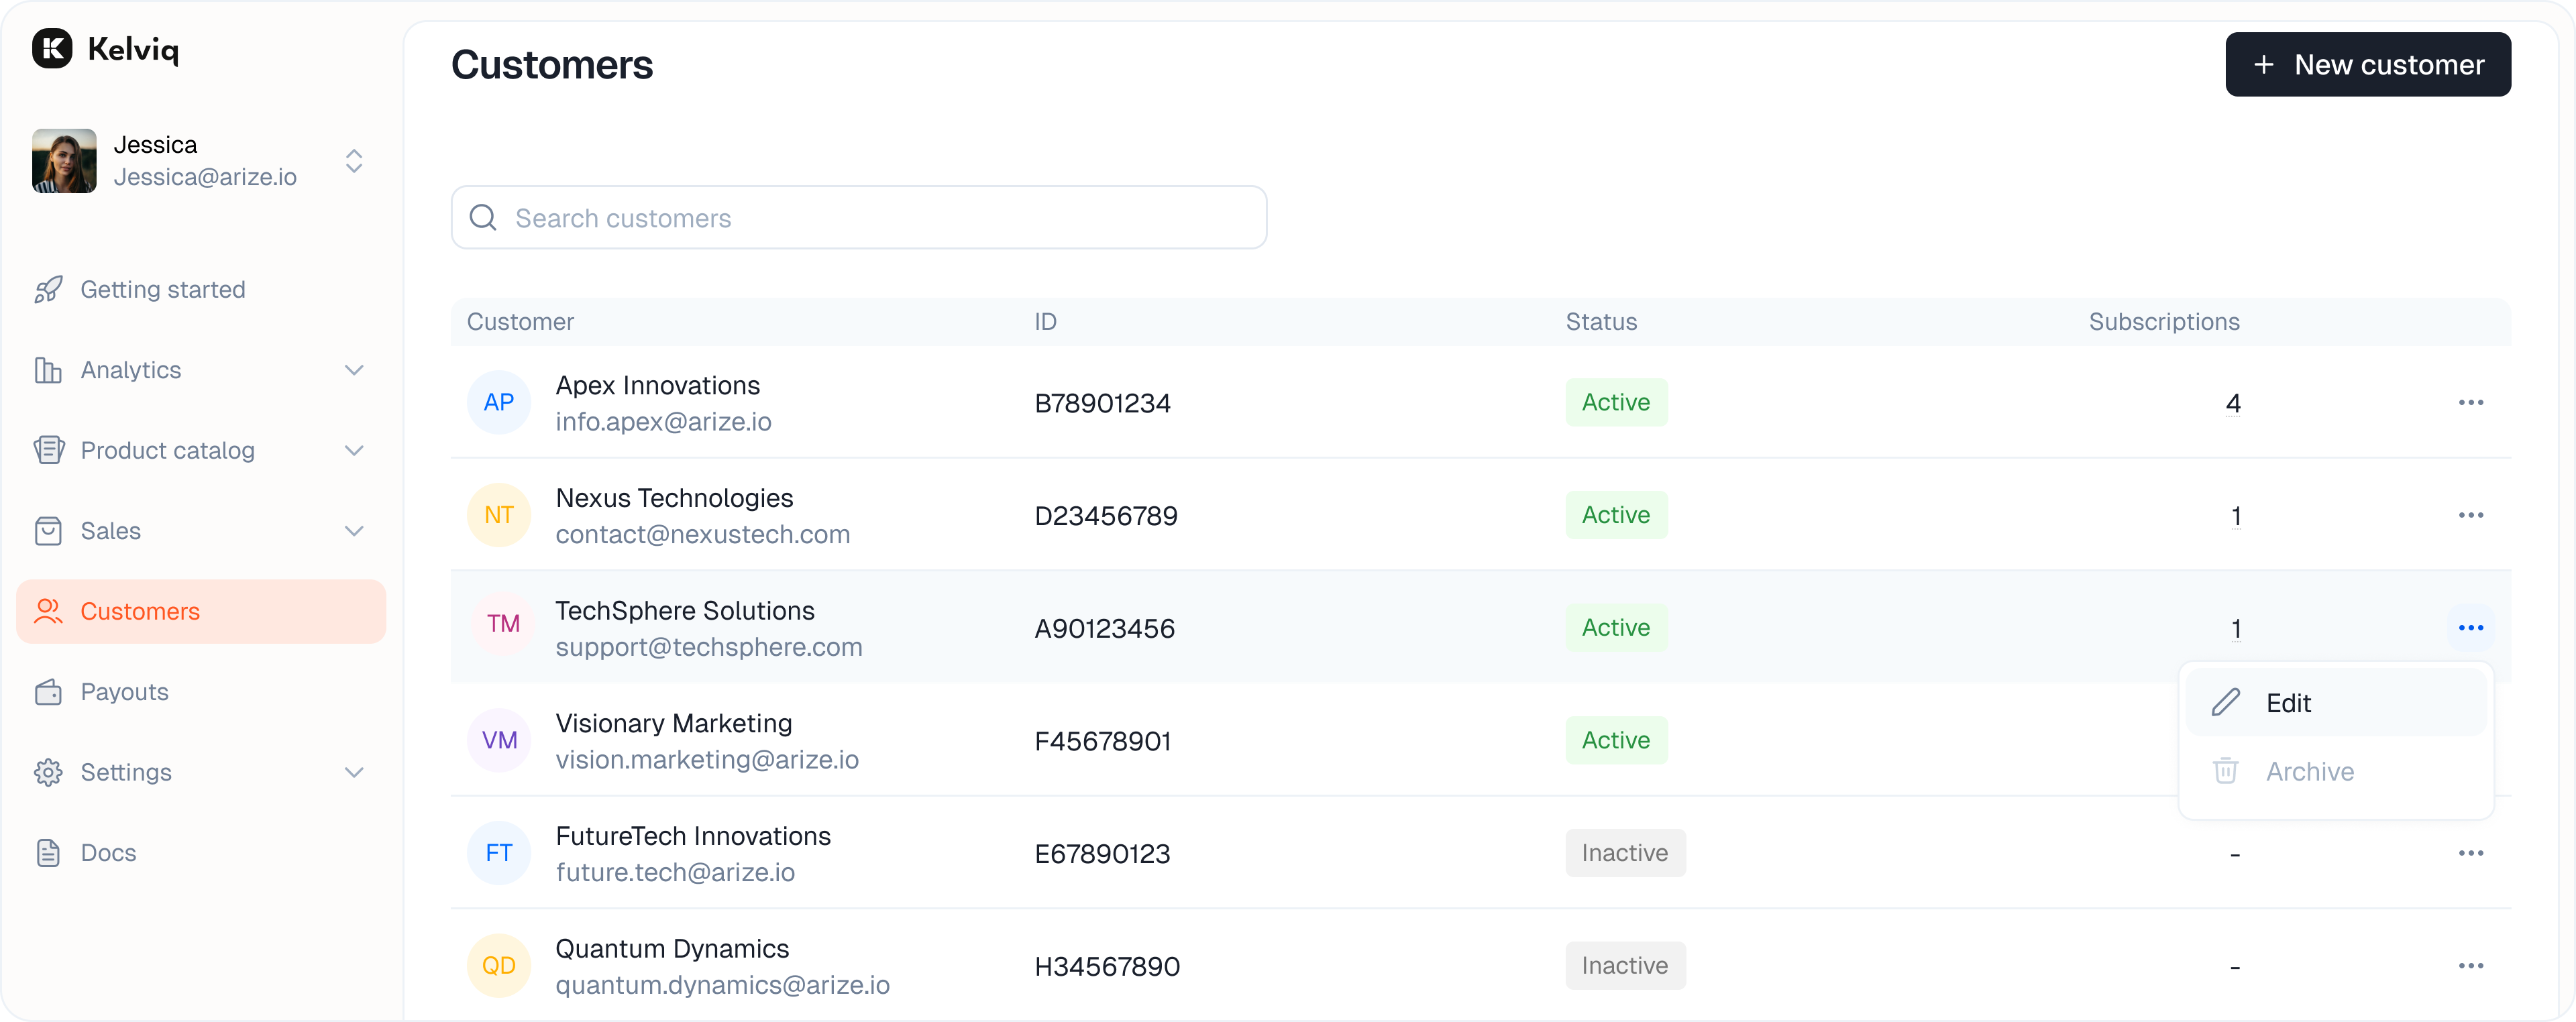 You can update the **Customer name** and **Email address**. The Identifier is fixed after creation and cannot be changed.
### Archive a customer
Archiving makes a customer inactive and revokes their access. Click the **three dots** and select **Archive**.
You can update the **Customer name** and **Email address**. The Identifier is fixed after creation and cannot be changed.
### Archive a customer
Archiving makes a customer inactive and revokes their access. Click the **three dots** and select **Archive**.
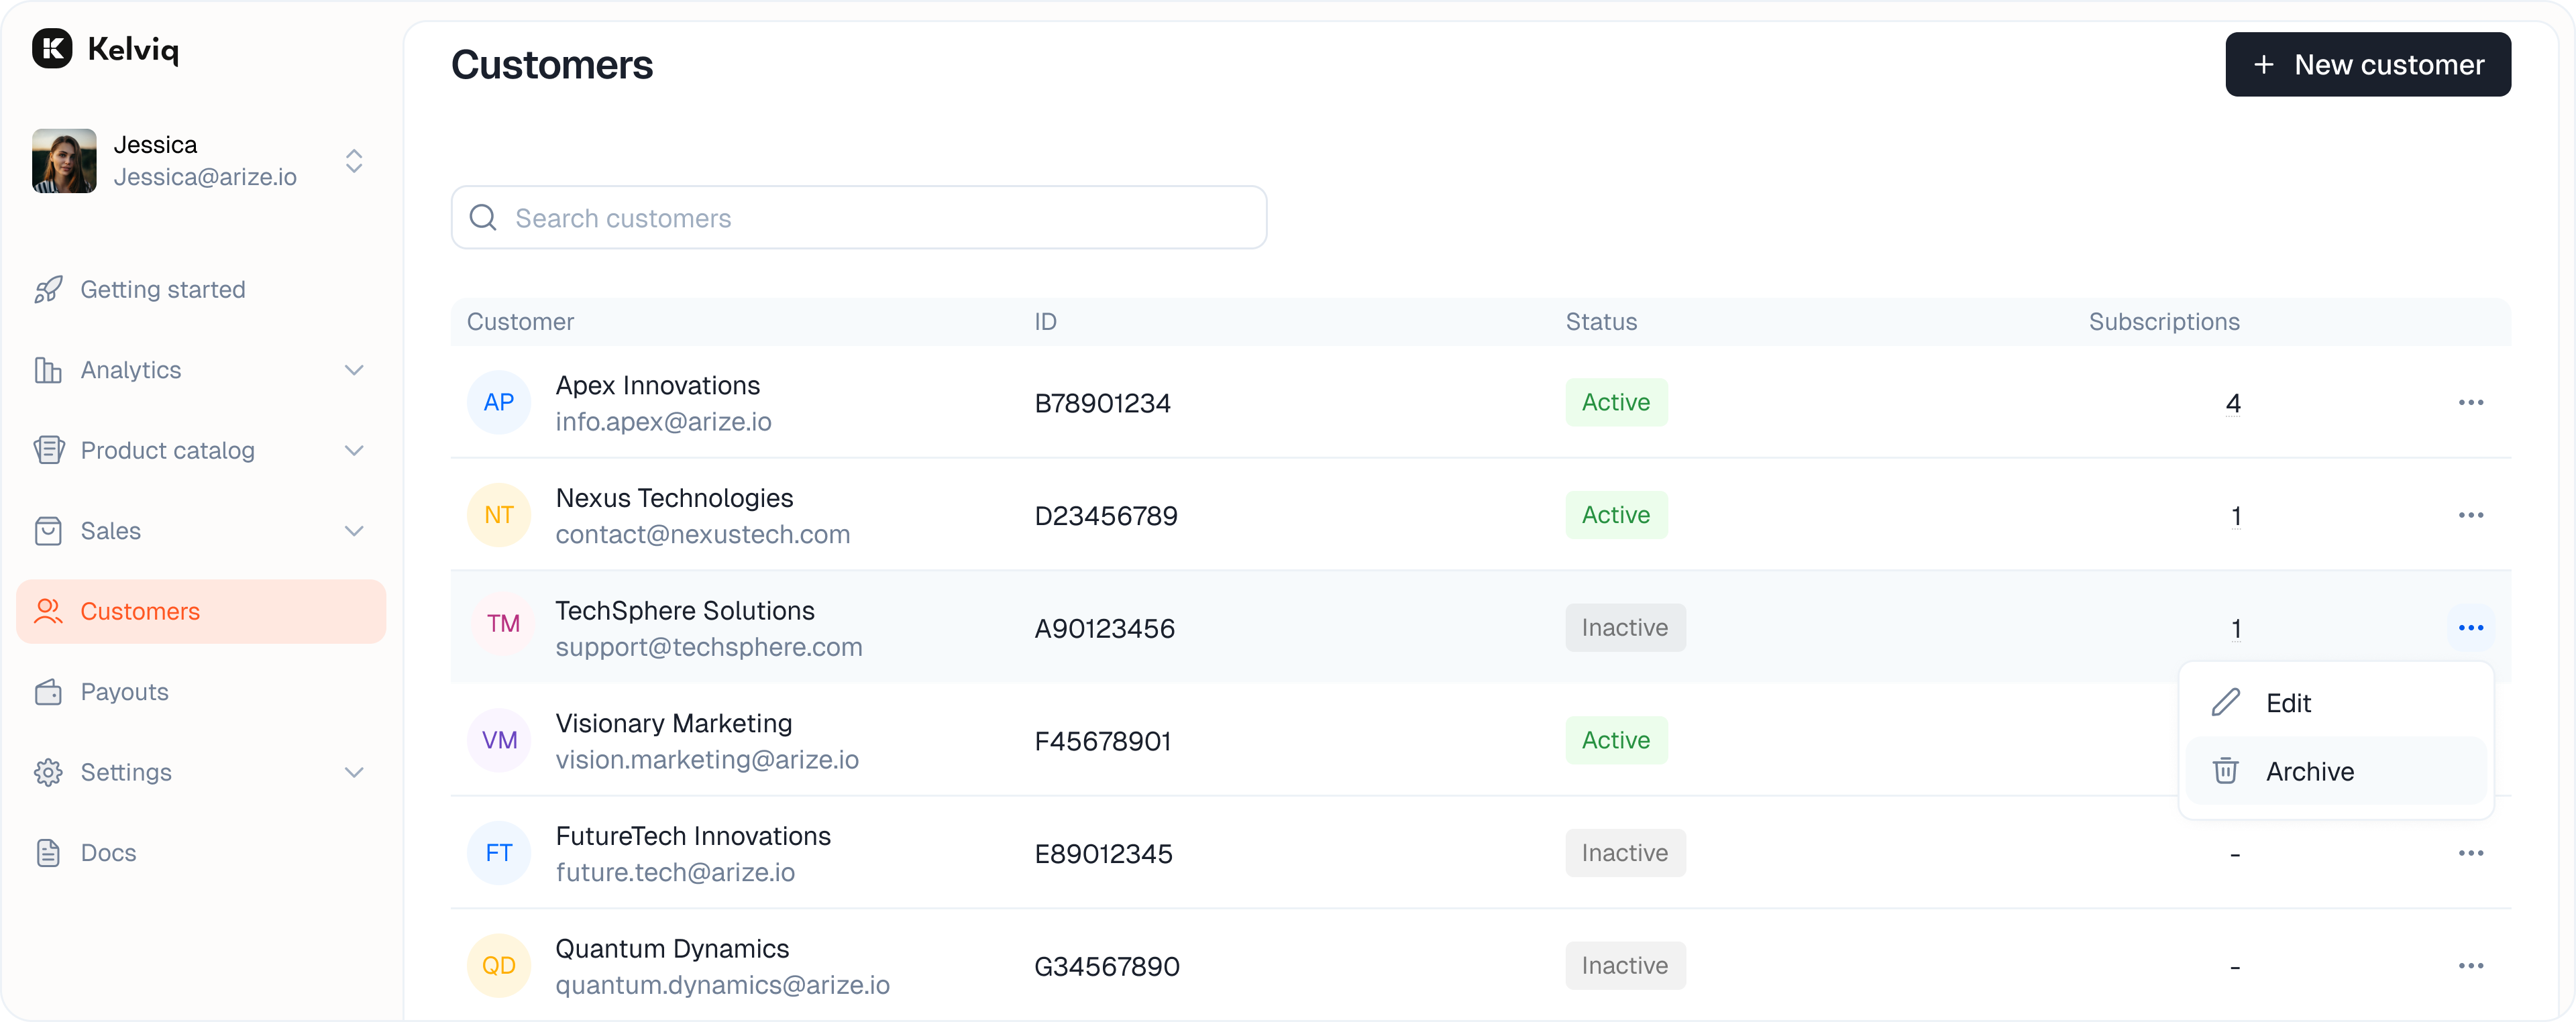 You will see a confirmation warning. Click **Confirm** to proceed.
Kelviq archives customers; it does not hard-delete them. The archived record keeps its Identifier, so that value cannot be reused. To create another customer with the same email address, use a new Identifier.
You cannot archive a customer with an active subscription. You must cancel their subscription first.
## Customer details
Click on any customer row to open their full profile.
This page holds the source of truth for that user. You can see their unique Billing ID and timestamps for when they joined or were last updated.
You will see a confirmation warning. Click **Confirm** to proceed.
Kelviq archives customers; it does not hard-delete them. The archived record keeps its Identifier, so that value cannot be reused. To create another customer with the same email address, use a new Identifier.
You cannot archive a customer with an active subscription. You must cancel their subscription first.
## Customer details
Click on any customer row to open their full profile.
This page holds the source of truth for that user. You can see their unique Billing ID and timestamps for when they joined or were last updated.
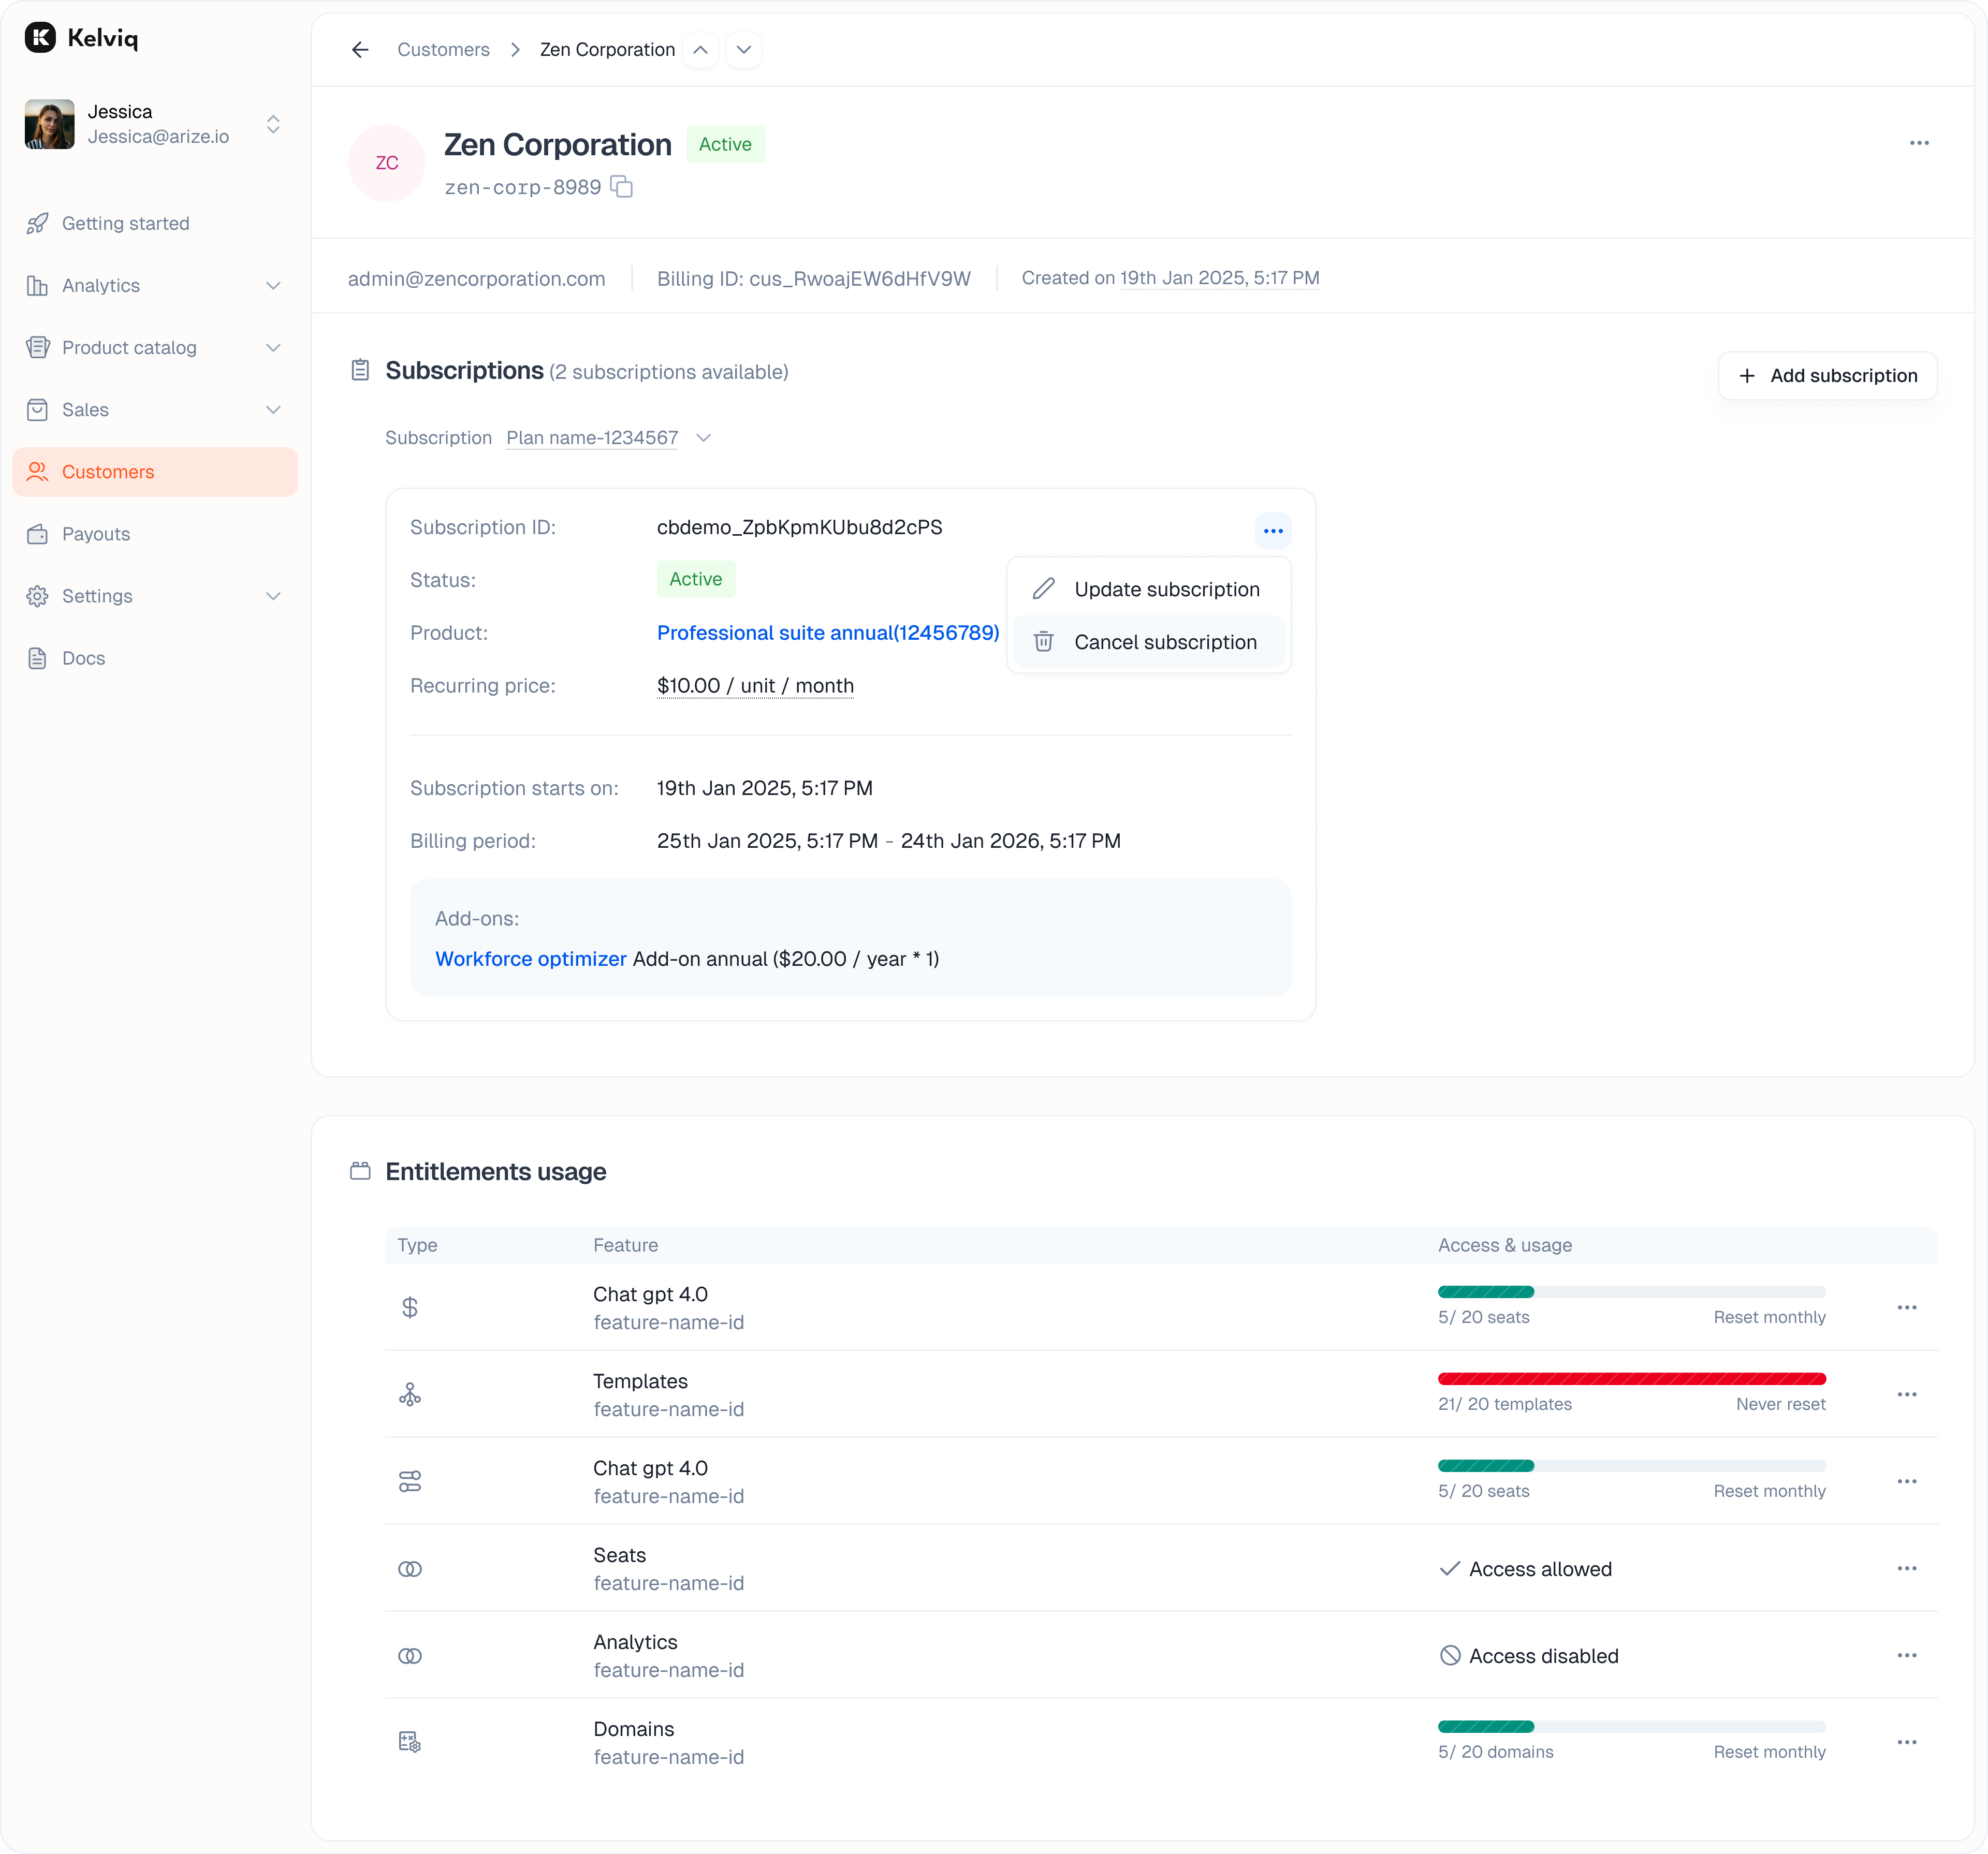 ### Subscriptions
This section lists active and past plans. It shows the status, such as Active or Canceled, and the relevant dates.
### Files, links, and license keys
The customer detail page shows the deliverables the customer received through their plans:
* **Files** — View and download digital files available to the customer.
* **Links** — Open private or external resource links attached to the plan.
* **License keys** — View issued license keys and use the available license-management controls.
These sections let support teams confirm access without opening each order separately.
For catalog setup, see [Digital Downloads](/product-catalog/digital-downloads), [Links](/product-catalog/links), and [License Key Management](/product-catalog/license-keys).
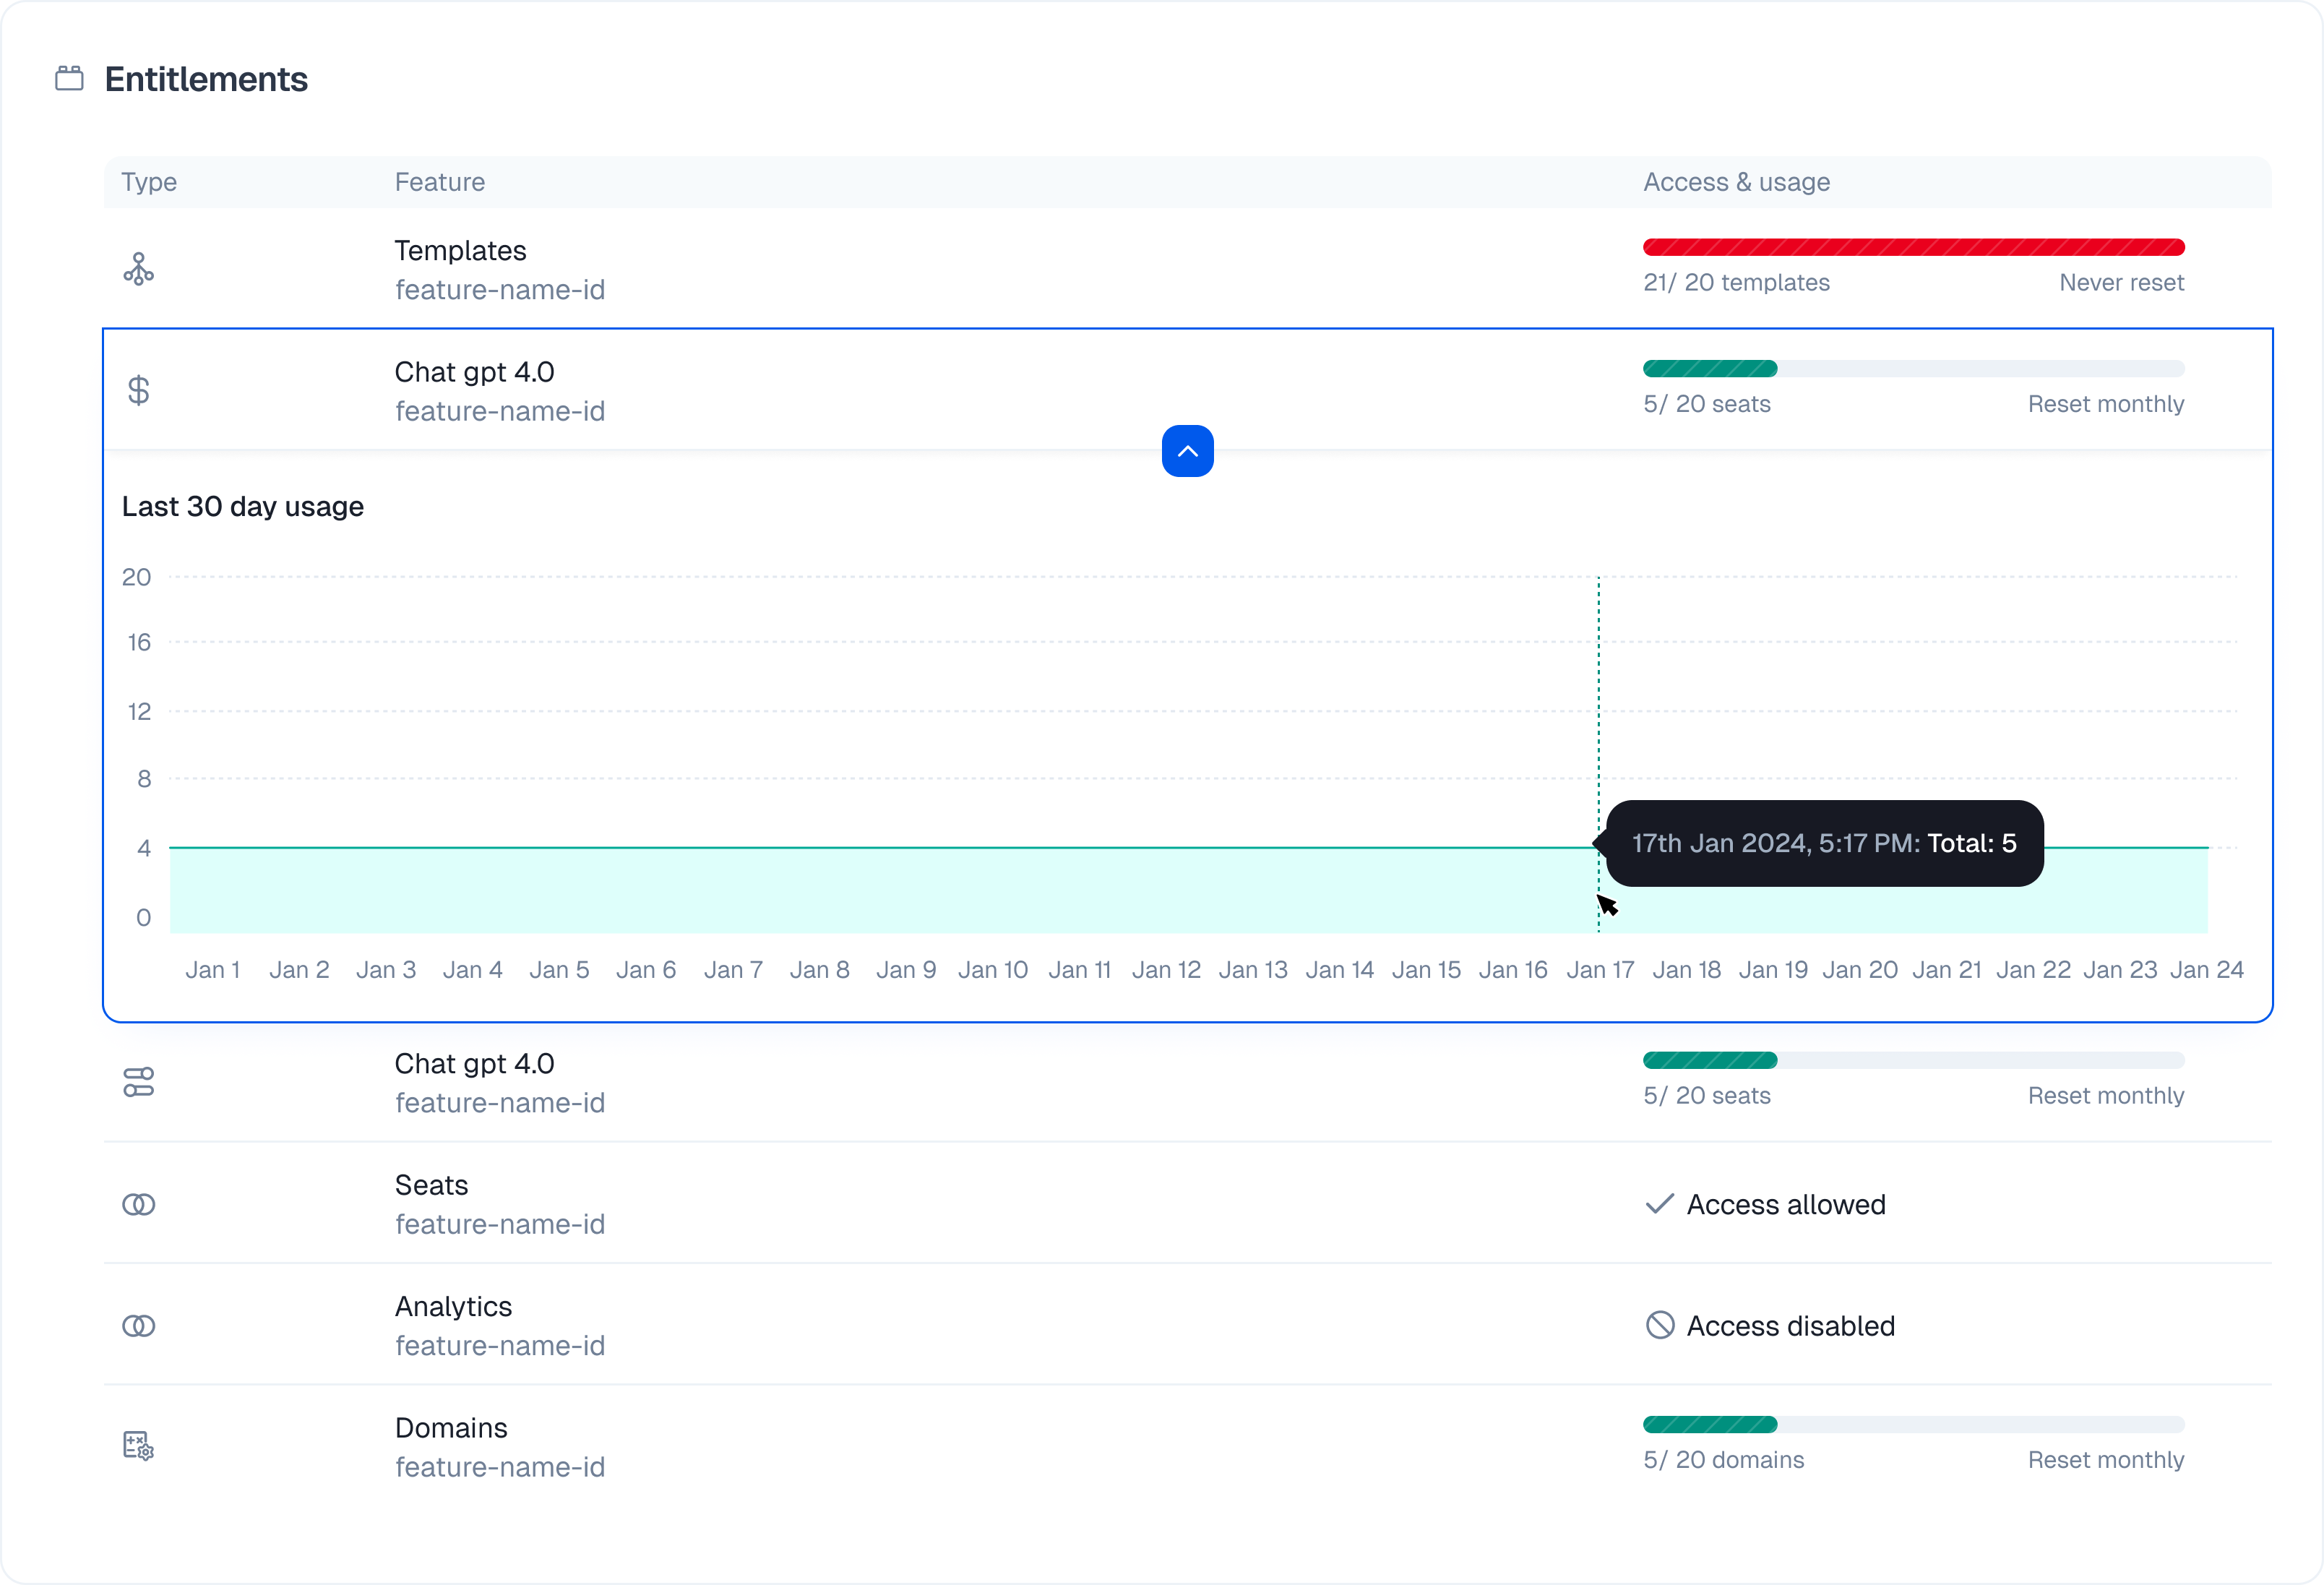
### Entitlements
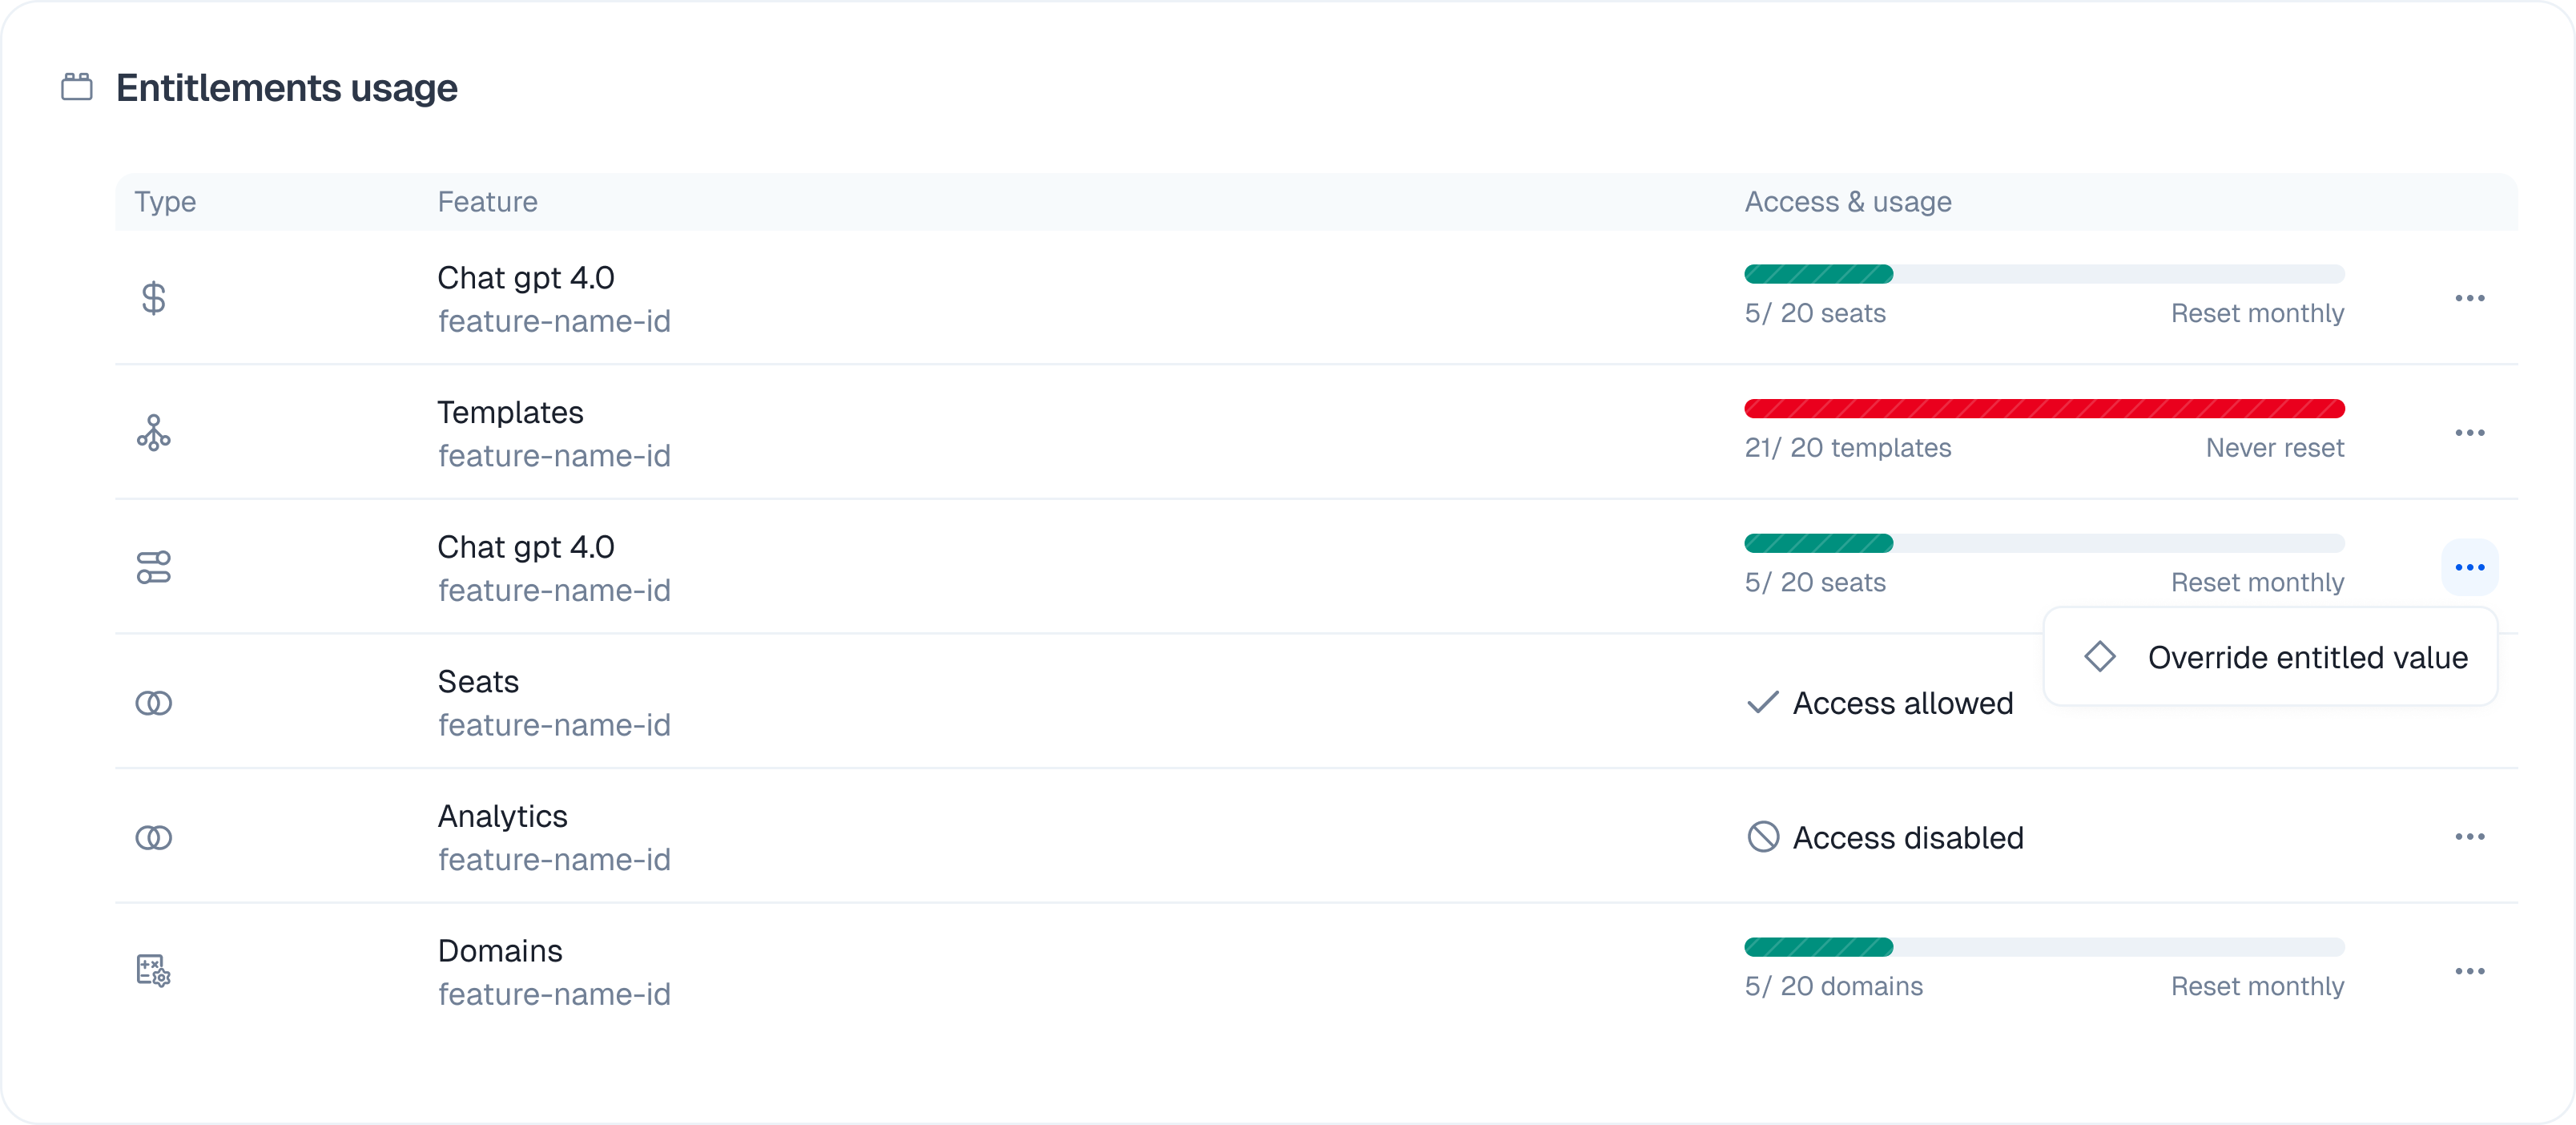
This view shows exactly what the customer can do right now based on their plan.
**Overrides**
You often need to make exceptions for specific users. You can do that here without changing the underlying plan.
* Change the value of a specific feature.
* Update the usage limit for a metered feature.
Changes made here apply only to this specific customer.
### Subscriptions
This section lists active and past plans. It shows the status, such as Active or Canceled, and the relevant dates.
### Files, links, and license keys
The customer detail page shows the deliverables the customer received through their plans:
* **Files** — View and download digital files available to the customer.
* **Links** — Open private or external resource links attached to the plan.
* **License keys** — View issued license keys and use the available license-management controls.
These sections let support teams confirm access without opening each order separately.
For catalog setup, see [Digital Downloads](/product-catalog/digital-downloads), [Links](/product-catalog/links), and [License Key Management](/product-catalog/license-keys).
### Entitlements
This view shows exactly what the customer can do right now based on their plan.
**Overrides**
You often need to make exceptions for specific users. You can do that here without changing the underlying plan.
* Change the value of a specific feature.
* Update the usage limit for a metered feature.
Changes made here apply only to this specific customer.
 ### Usage
This tracks consumption for usage-based billing.
* Graphs show usage trends over time.
* Hover over the data to see exact numbers for specific periods.
### Usage
This tracks consumption for usage-based billing.
* Graphs show usage trends over time.
* Hover over the data to see exact numbers for specific periods.